Replacement pumps are supplied without a power cable as the wiring is unique to each Spa and therefore you will need to follow this help sheet in order to replace it.
Your old existing pump will have been connected to your Spa pack via a plug-in connector that is moulded to your pump power lead. The connector will be either a grey 'JJ' plug or an AMP type plug.
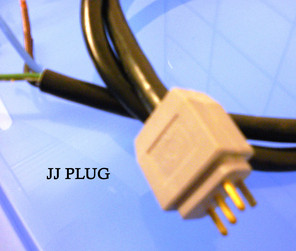
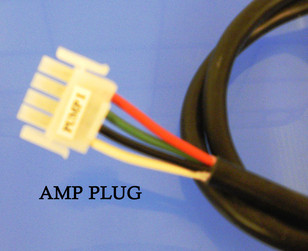
This cable would have been fitted to your old pump by the Spa manufacturer and is not included with the replacement pump. This means that your new pump will need to have your existing cable removed from your old pump and attached to the new one.
There are four options available for cable replacement, they are:
- You fit the cable with information provided in the help sheet below (if in any doubt, see items 2 - 4 below)
- Consult a qualified electrician (dependant upon your skills and confidence)
- Hydrospares fitted cable (either send us your existing cable or we can fit a new one)
- If your pump is supplied with a cable and has bare wire ends, Hydrospares can supply a connection that will prevent the need to open the motor electrical box. Please contact Hydrospares for further details and information.
Top Tip - Before comencing to remove your pump, take as many photographs as possible of your installation, pump and wiring connections. Do not cut the power cable or remove the cable ring terminals as you will need this later.
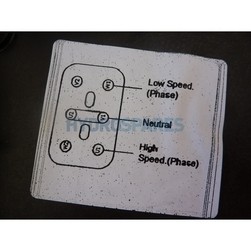
Before removing the power cable from your old pump, refer to the wiring diagram in the motor connection box lid and record the wire colour going to the high and/or low speed termminals. Make sure that the moter is switched off and isolated.
Please note
The wiring colour is set/determined by the manufacturer of the Spa, NOT the motor manufacturer. Power cable colours vary around the world and below are charts of the most common colours and functions from the UK and USA that you are most likely to come across.
Power Cable Colour Chart - UK & USA
3 Core cable
| UK | USA | Function |
| Brown | Black | Low Speed Live |
| Blue | White | Neutral |
| Green/Yellow | Green | Earth |
4 Core cable
| UK | USA | Function |
| Brown | Black | Low Speed Live |
| Black | Red | Hi Speed Live |
| Blue | White | Neutral |
| Green/Yellow | Green | Earth |
With this information you are now in a position to swap your old power cable over to your new motor.
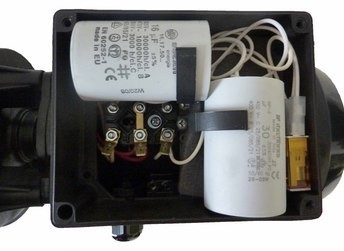
Remove the lid from the moter electrical box with a phillips scewdriver and make a note of the wiring colour and connections. Slacken-off the cable gland on the side of the box. With a 7mm spanner, undo the nuts from each terminal post one at a time. You may find that you will have to remove several wires to achieve this. Once the wires have been relaesed you can now remove them from the box through the cable gland.
With your new pump in front of you, remove the lid from the motor electrical box and note the wiring diagram inside. With your old cable and the ring terminals still attached, thread the cable through the cable gland. Attach one cable at at time to their respective terminal posts on top of any other cables that are present using a 7mm spanner. Do not overtighten. Tighten the cable gland, re-fit the lid, re-connect all the plumbing and test your new motor.
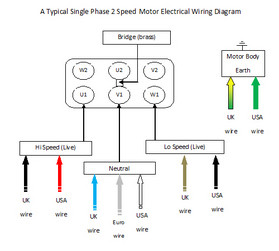
Below is a typical example of a popular motor single phase, 2 speed installation.
Pump: Waterways 56 frame EMG Motor, 2 speed. Part no. 10-056-03
